 Care to join? First things first, you're going to need a bed. In my case, I'm fully stocked. I prefer a Gigantor-sized bed. My height probably/definitely plays a role. I've got short person's complex; bigger is better. That being said, I have a CA King size bed, and two twin box springs situated underneath. Last week I scored an appropriately-sized super basic adjustable frame for $20. My bed now rages at a sweet 30" off the ground; functional for us bed dwellers, and too bad so sad for my three small furry comrades who previously had full reign of the bed.
So here's what was on my shopping list:
- Plywood - 65" Wide by 35" Tall. I went to my local Home Depot, and they cut my plywood for me. *Note that my measurements were based upon my own aesthetic preference for a CA King bed. Do what works for ya.
- Security Hangers (interlocking) - two sets.
- Screws w/ appropriately size anchors - at least 8.
TOTAL $22.95 @ Home Depot
- Upholstery Fabric - In my case, 2 1/4 yards by 1 1/2 yards. This can get pricey, be careful! I almost chose a fabric that was $30/yard, that would have cost me $70 for the fabric alone. I ended up choosing a Joann Red Tag Fabric for only $6/yard, score. Recession-friendly!
Foam - same measurements as your plywood. And let me mention now, DANG is foam expensive, I had no idea! Almost $30/yard!! (Got this 40% off)
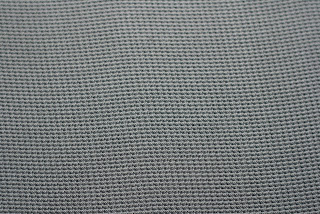
Here's a closeup of the fabric:
 I chose this fabric because it's neutral, and I just love the texture. The price didn't hurt either.
Polyester Batting (extra lofty) - same measurements as your upholstery fabric. Oh, and if you're wondering what batting is (I had no idea), it's a roll-out stuffing that is often placed inside quilts. Extra lofty means thicker. (Got it 40% off)
* Optional: Upholstery buttons for a tufted headboard. See tutorial at the bottom.
TOTAL $52.09 @ Joann - However, I got a stellar deal with my plethora of coupons from Coupon Commotion week. Oh. That make me sound like a craft nerd. Whatever, it's all true.
Grand Total Spent: $75.04 (Not bad, right?!)
All right, so let's start things off with a crappy photo. Here you can see the foam, the packaged batting, a messy bed, and a lonely wall. Let me go ahead and apologize now for the total lack of helpful photos on my end, I'll try to be better about this next time.
 Step 1: Use spray adhesive to attach foam evenly to plywood.
Step 2:Once in place, place batting directly on floor, and place headboard foam side down evenly across the batting to allow for excess on each side of the back of the plywood. Pull the batting tightly behind one side of the width of the back of the plywood on one side, and staple in place. Repeat until the entire width of that side is stapled in place. Keeping the recently stapled side on the ground, stand up, and pull the opposite side up straight in the air. Pull the batting across the front as tightly as possibly, and smooth out any lumps/wrinkles/kinks; holding firmly, staple into place. Repeat the same process on the two remaining sides, making sure the batting is pulled back as tight as possible to ensure a smooth surface on the front for your upholstery fabric.

Step 3: Just as you did with the batting, you're going to place your upholstery fabric on the ground (right side down). Place the headboard batting side down in the center of the fabric, and ensure there is enough excess on each side fabric on each side. Again, choose one width of the headboard, and staple evenly. Stand up, and repeat the process of pulling tight and stapling, until all sides are smooth from the front, and pulled tight. Be sure to keep a friend handy for steps 2 and 3.

Step 4: Pop your security hangers out of their packages. Check out the directions on the back of the box. In my case, the first step was installing plate one to the back of the plywood. Choose measurements to your own taste. In my case, it was six inches down from the width of one side, and four inches in from the length. Mark measurement for plate, screw in accordingly. Be sure to use a level; I used my handy dandy iPhone application for this, it worked like a charm. Mark same measurements on the opposite end of the plywood. Repeat the plate installation process. Whew! We're almost done now.
Step 5: Measure the width of your mattress. Using the length of your headboard, note the width of your mattress, and calculate the measurements between each. For example, my headboard measures 65" in Width, and my actual mattress is 72" in Width. That leaves me seven inches to center my headboard within my mattress; 3 1/2 inches on each side. Measure the headboard from the bottom to the top of the attached bracket. Now, think of where you want the bottom of the bed frame to sit, and take those same measurements you just took on the headboard, measure up, and mark the wall. Do the same on the opposite side. Take the measurements on the headboard between the two brackets, and mark the same between the two marks you just took on the wall. Now that I'm typing this, it seems to be a tad complicated. But really, it's not! Common sense will (or should, at least) guide you!
Step 6: You should now have 4 marks on the wall. I marked each with an X for screws to go into the wall brackets. Before you start, check your wall for a stud. If you have one, fantastic, you can just screw straight in. If you couldn't find one, you're not alone, I had the same problem! To solve this, we install anchors before screwing the plates in. To do this, just hammer a screw into each of your 4 marks on the wall. Once you create a hole, pull the screw out. If the hole isn't large enough to fit your anchor snugly, you can use your drill to assist with the job. Once the anchor is inserted, use a hammer to flush the anchor with the wall. Now that you have your 4 anchors, start screwing in your plates. I used an anchored screw for the top 2 holes of the brackets, but screwed the bottom 2 holes in without. I think they are sufficient for the job at hand.
Step 7: Now, the last step. Grab a friend (or three), to help you position the brackets on the back of the headboard to be interlocked with the brackets on the wall. This step can be tricky, especially if you fudged up your measurements. Once you've got both brackets in place, pull down and tight for a snug fit. Scoot your bedframe back in place. And BAM! I've got a sweet headboard.
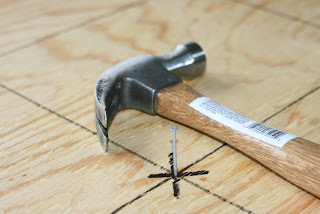
* As promised, here's the tufted button tutorial. You can create tufted buttons by creating upholstered buttons in the same fabric (just follow the directions on the back of the button box). Create pilot holes by hammering a hole in equal measurements where you want the buttons, and remove the nail each time for a perfect sized hole (do this after Step 1 (attaching the foam) and before Step 2 (attaching the batting and fabric).
Then, AFTER Step 3, use an upholstery needle and go through the back of the headboard through the foam and batting, attach the button through the button shank, and sew back through the plywood. Secure by twisting wire tightly in place. Repeat as necessary. You can see below that I started the process of measuring and marking for the buttons, but opted to skip the tufting because I didn't have a long enough needle. Boo.

 I hope that was helpful or some way, shape or form. If not, sorry Charlie!
Man, my "After" photo brought to my attention that my bedding is in dire need of an overhaul. Next project: DIY Duvet cover!